
Contents
Summary
In many cases you want to start or stop a VM instance in GCP very quickly. You can do this by using Cloud Functions and a few lines of Python.
In this article I’ll be showing you how you can do that with a very easy and simple to follow instructions.
The idea behind this was that I wanted to easily let my family start and stop the small Minecraft server that I have built for us, so that any time the kids want to play, the server can be started easily without anyone logging into the Cloud Console.
So I thought of finding a way to let them just hit a simple URL which in turn will do the job. That’s where Cloud Functions on GCP come in.
So in this article, I’ll be showing you the following:
- The prerequisites prior to setting up your Cloud Function.
- The required IAM permissions and service account.
- The code that I’m using.
- The Cloud Function deployment process.
- And some final considerations before you finalize the deployment.
The Expected Costs for This
Technically you should have billing enabled on the project that will host the Cloud Function. However due to the nature of this function (that you only request it when you want to start or stop a VM), there may be no charges at all, and you will only be in the free tier for a very long time with this!
Prerequisites
So in order to get this simple implementation going, you need to keep in mind the following mandatory requirements:
- The first important prerequisite is obviously a GCP project with billing enabled.
- Then the Cloud Functions API should be enabled as well. The billing must be enabled for this to be done.
- The project ID, Zone, and VM name that you want to start and stop.
IAM Permissions Requirements
You will need to be the owner of the project that you will use. This is important because you will need to enable the Cloud Functions API, and the Cloud Build API as well.
If you are the one who created the project and enabled the billing on it, then you already have ‘Owner’ permission by default. However if you are using an existing project that you are not the one who created it, then you will need to make sure you have the ownership level permission on that project.
You will also need a service account to be used by the Cloud Function so it can start and stop the VMs. It is a good idea that you use a dedicated service account for this so that you can get full control over the permissions and when you want to revoke the permissions or change them. This will be much easier than just using one of the default service accounts..
The required IAM permissions for this service account are:
- Compute Instance Admin (v1)
The Cloud Functions Python Code
I will be using 2 functions here. One to start the VM, and the other is to stop it.
Both functions are consisted of two files:
- The ‘main.py’ file – which does contain the actual code.
- The ‘requirements.txt’ file – which does contain the required libraries for this to work.
The ‘main.py’ File
Start VM Code
The below code is very simple and straight forward to read and implement. This is a 6-lines code that will define the Compute Engine API library for Python, and then invoke the start() function to start the target VM:
import googleapiclient.discovery

def start_vm(request):
    compute = googleapiclient.discovery.build('compute', 'v1')
    result = compute.instances().start(project='PROJECT_ID', zone='ZONE_NAME', instance='VM_NAME').execute()
    return result
There are a few points that you need to watch out for:
- Replace ‘PROJECT_ID‘ with the ID of your own project. I’ll get to how you can get that in a bit.
- Replace ‘ZONE_NAME‘ with the name of the zone where you are running the VM that you want to start/stop.
- Replace ‘VM_NAME‘ with the VM instance name that you want to start/stop.
Stop VM Code
Similar to the start code, this code is the exact same except for the function to call which is stop().
import googleapiclient.discovery

def stop_vm(request):
    compute = googleapiclient.discovery.build('compute', 'v1')
    result = compute.instances().stop(project='PROJECT_ID', zone='ZONE_NAME', instance='VM_NAME').execute()
    return result
Same as the above, you need to watch for the following:
- Replace ‘PROJECT_ID‘ with the ID of your own project. I’ll get to how you can get that in a bit.
- Replace ‘ZONE_NAME‘ with the name of the zone where you are running the VM that you want to start/stop.
- Replace ‘VM_NAME‘ with the VM instance name that you want to start/stop.
The ‘requirements.txt’ File
The ‘requirements.txt’ file is the same for both actions. This is where I actually listed the required client libraries to run the function.
In this case I only need one library which is the Python client library..
google-api-python-client==1.10.0That’s all what is required for this file.
The Deployment Process
Preparing the Prerequisites
Getting the environment information
There are 3 important pieces of information that we need to prepare:
The project ID, and this can be retrieved by just going to the home page of your GCP project, and the locating the Project info card. The project ID will be mentioned there.
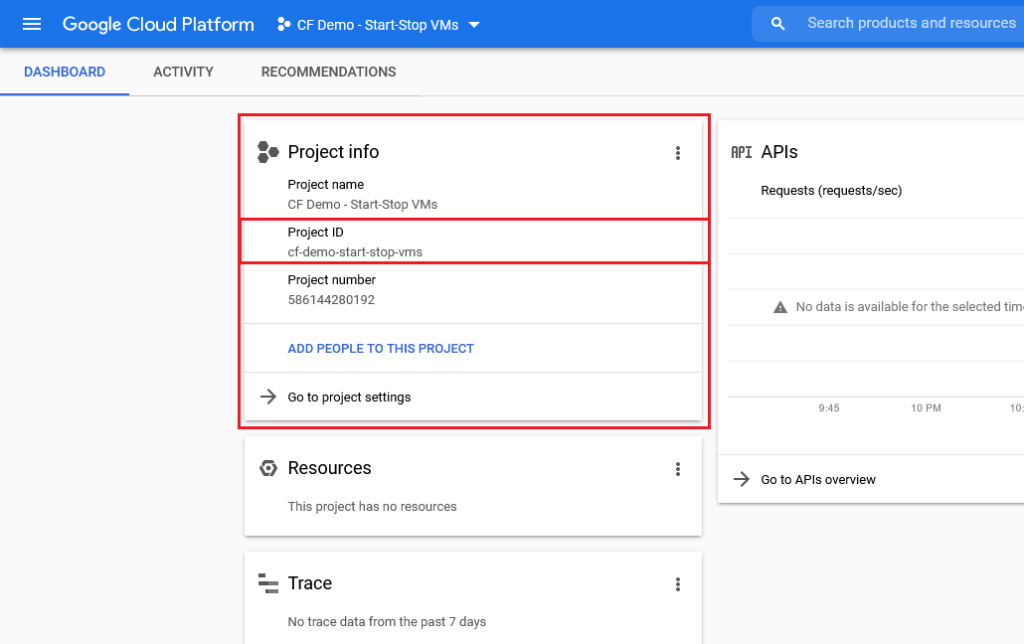
You should save the value of the Project ID in a notepad or some other place, because you will need it in a bit.
The second piece of information is the GCP Zone name where the target VM that you want to start and stop is located.
This is easily found by going into the properties of the VM, where we will also get its name..
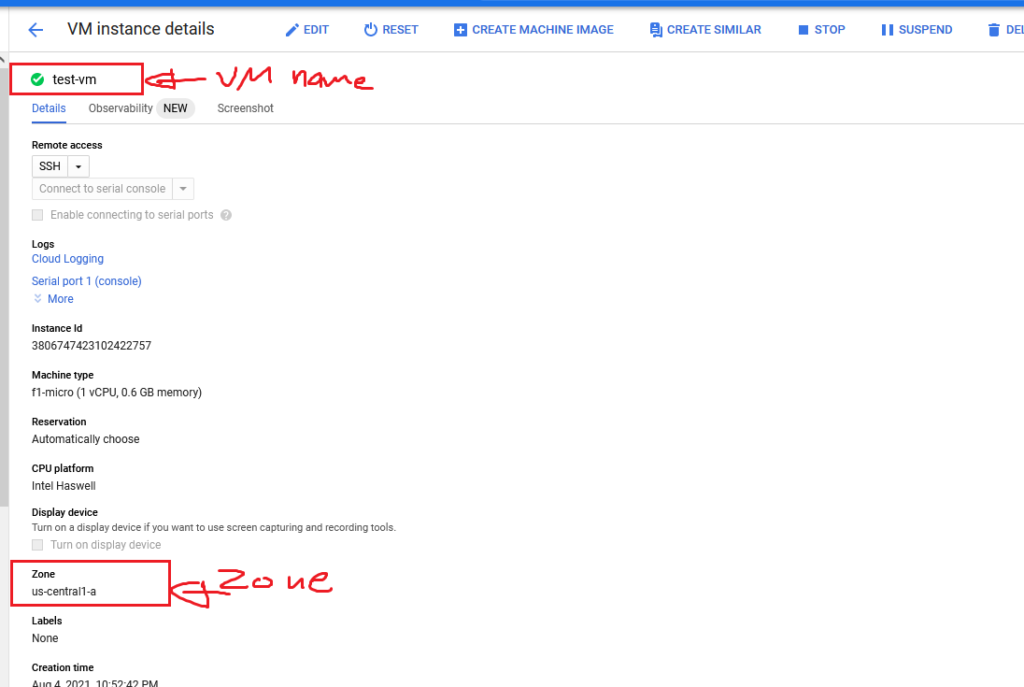
Also you need to save the two values here. The VM name which is shown at the top of this screenshot, and the Zone, which in this case is ‘us-central1-a’.
Creating the service account
Before I start with the actual Cloud Functions deployment, let me first cover the service account creation because it is a very critical step that you should not miss!
So the point of the service account as I have explained in the top is to ensure you have better visibility over the permissions and who is doing what, and at the same time, you will get better control over the permissions and you will have the option to revoke them any time you want.
This is a simple process that you can complete in a few steps:
- Go to the GCP Cloud Console.
- Open the menu on top-left side of the page – that is found next to Google Cloud Platform logo/title.
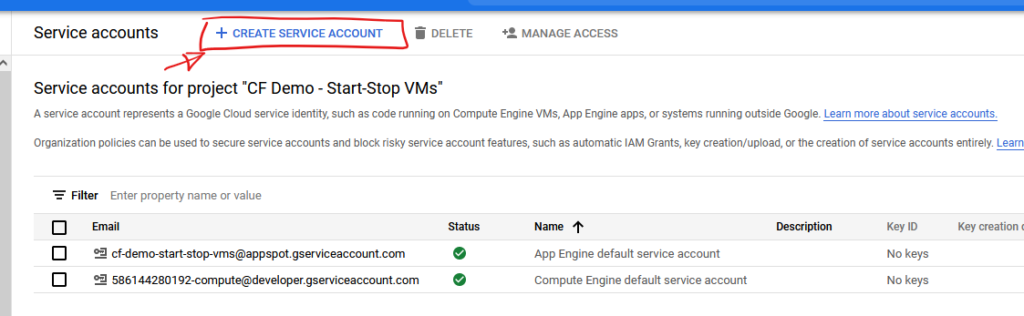
- Navigate to ‘IAM & Admin‘ -> ‘Service Accounts‘.
- In the service accounts page, click the ‘CREATE SERVICE ACCOUNT‘ button that is found at the top of the page.
- In the new service account creation page, enter the following details in the first section ‘Service account details‘:
- Service account name
- The service account ID field will automatically be filled based on the value that you type in the name field. The default value should be fine, you can skip this field..
- Enter any description that you want if you need to have some sort of an easily identified description and information about this service account, otherwise just click the ‘CREATE AND CONTINUE‘ button.
- Then in the ‘Grant this service account access to project’ section, click the ‘Select a role‘ text box, and search for ‘Compute Instance Admin (v1)’, and then select it from the list.
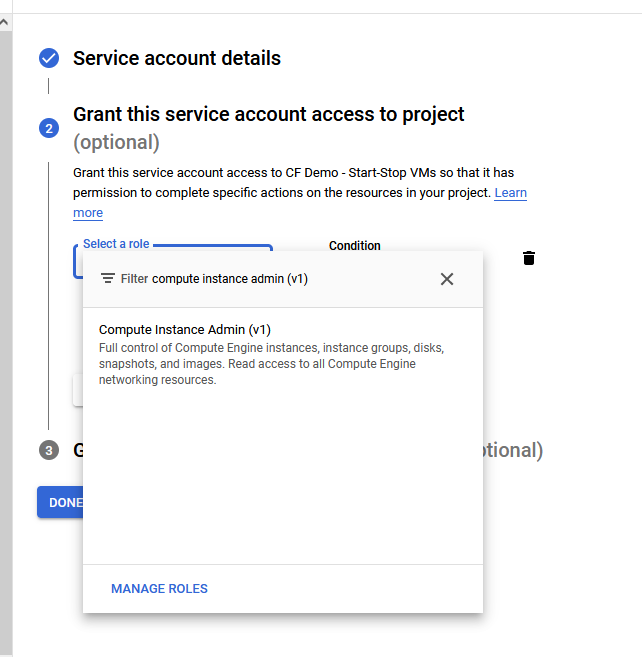
- Click ‘CONTINUE‘ and then ‘DONE‘.
Enable the Cloud Functions API
The next step after preparing the required information is to enable the Cloud Functions API so that we can deploy our scripts.
This is a very simple and a straight forward process.
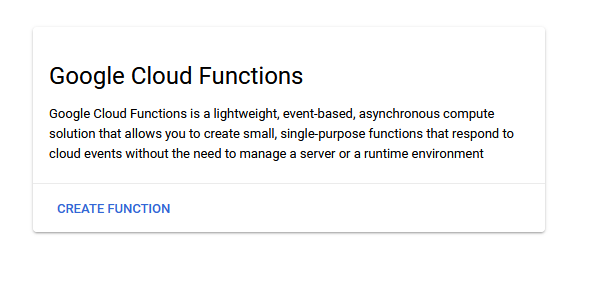
You will need to go to the Cloud Functions page in the GCP project, and most likely it will just start on its own to enable the API for you…
Once it is ready, you will just need to click the ‘CREATE FUNCTION’ button.
In case the API wasn’t enabled for some reason, then you can still enable it manually by navigating to the API page and enabling it:
- Open the menu on the top-left side of the page.
- Navigate to ‘APIs & Services‘ -> ‘Library‘.
- In the Library page, search for ‘cloud functions‘, and then open the result ‘Cloud Functions API‘
- In the ‘Cloud Functions API‘ click the blue ‘Enable‘ button.
Enable the Cloud Build API
Cloud Build API is also required for this. To enable the API you can follow these steps:
- Open the menu on the top-left side of the page.
- Navigate to ‘APIs & Services‘ -> ‘Library‘.
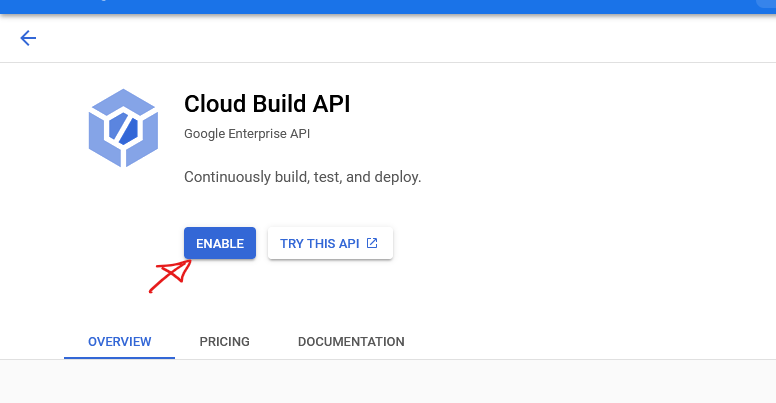
- In the Library page, search for ‘cloud build api‘, and then open the result ‘Cloud Build API‘
- In the ‘Cloud Build API‘ click the blue ‘Enable‘ button.
Creating the Start Function in Cloud Functions
In Cloud Functions, click ‘CREATE FUNCTION’ and then follow these steps to create the start function:
- Set a name for your function in the ‘Function name‘ field.
- Select the region where you want to run the function from in the ‘Region‘ field.
- Change the following fields in the ‘Trigger‘ section:
- Set the ‘Authentication‘ option to ‘Allow unauthenticated invocations‘ – This is for testing purposes only. You need to make sure you never allow unauthenticated requests for such type of scripts and endpoints because they will affect your environment. I will be linking an article at the end of this section for how to call the function with an authenticated request…
- Check the ‘Require HTTPS‘ check box. Then click ‘SAVE‘
- Expand the section ‘RUNTIME, BUILD AND CONNECTION SETTINGS‘, and then do the following:
- In the ‘Runtime service account‘ setting, expand the drop down menu and select the service account that you created previously in the above steps.
- Click ‘NEXT‘.
- In the next page, it is the time to copy the code and scripts:
- In the ‘Runtime‘ field on the top of the view, select ‘Python 3.8‘
- Set the ‘Entry point‘ field value to ‘start_vm‘
- Make sure you are selecting the ‘Inline Editor‘ in the ‘Source code‘ field, and then select the ‘main.py‘ file.
- In the right side code section, paste the code that is mentioned in the section The Cloud Functions Python Code -> The ‘main.py’ File -> Start VM Code
- Make sure you change the highlighted values as described in that section with your own values (project ID, zone, and VM name).
- Then click the ‘requirements.txt‘ file, and paste the following inside it: google-api-python-client==1.10.0
- Click the ‘DEPLOY‘ button.
The function will take a few minutes to be deployed and show as ready. Until it is deployed, you can move on to the next script which is the stop function.
Creating the Stop Function in Cloud Functions
This is almost similar to start function, so you need to follow the same steps, except for the naming of course, and also once you reach steps 6.2, then you need to set the entry point to ‘stop_vm‘ instead of ‘start_vm‘. Also step 6.4, you will need to paste the code that is in the section The Cloud Functions Python Code -> The ‘main.py’ File -> Stop VM Code instead.
Once you are done with these steps also you can just click ‘DEPLOY‘ and wait for the second script to be deployed.
Additional Permissions Requirements
In my example, I set the function execution permissions to ‘allow unauthenticated’ which is totally not secure but it is a way for me to test and to show you how it will work.
In your case you should NEVER set this to allow unauthenticated requests, and it is your responsibility to secure the function.
The following article explains the process to ensure that the function is always invoked by an authenticated client where you will need to create an authorization token and use it every time you request the function:
Testing
Now the main deployment works are done, it is time to test it all out!
Get the trigger URL for both of your Cloud Functions by going inside each one, and then go to the Trigger tab.
- Check the status of your target VM, so if it is in started state, trigger the stop function, and then monitor its status. It should shut down very shortly after you trigger the stop script.
- If it is in the stopped state, then it will start up immediately after you trigger the start script!
- Check the logs in each of the Cloud Functions to make sure everything went fine and there are no errors.
Further Improvements and Expansions Using Cloud Functions or Other GCP Services
This approach is very easy and simple. It is all about 6 lines of code that allows you to start and stop your VMs very flexibly and freely!
You can enhance this further by expanding on this in modifications or customization that may fit your own needs and scenarios. For example you can:
- Create a control panel where you list the status of multiple VMs and add buttons to start/stop them. This lets your users or anyone who is the owner of these VMs to control the state of these VMs without getting into the Cloud Console..
- Add more features to this script such as a restart feature as well. This way you can let people have the option to start, stop, and restart the VMs when needed to without pinging you or getting into the Cloud Console as well.
- Connect it to Pub/Sub and change its trigger to be based on an event or a message from Pub/Sub and get some automation going on!
- Reference to the ‘Additional permissions’ section, you can also get away with keeping the function to accept unauthenticated requests, but you can implement IAP in front of it. This way you make sure only the people you allow through IAP can request and invoke the function.
Checkout my other blog posts here.
Check out my channel on Youtube and subscribe :-):
No responses yet